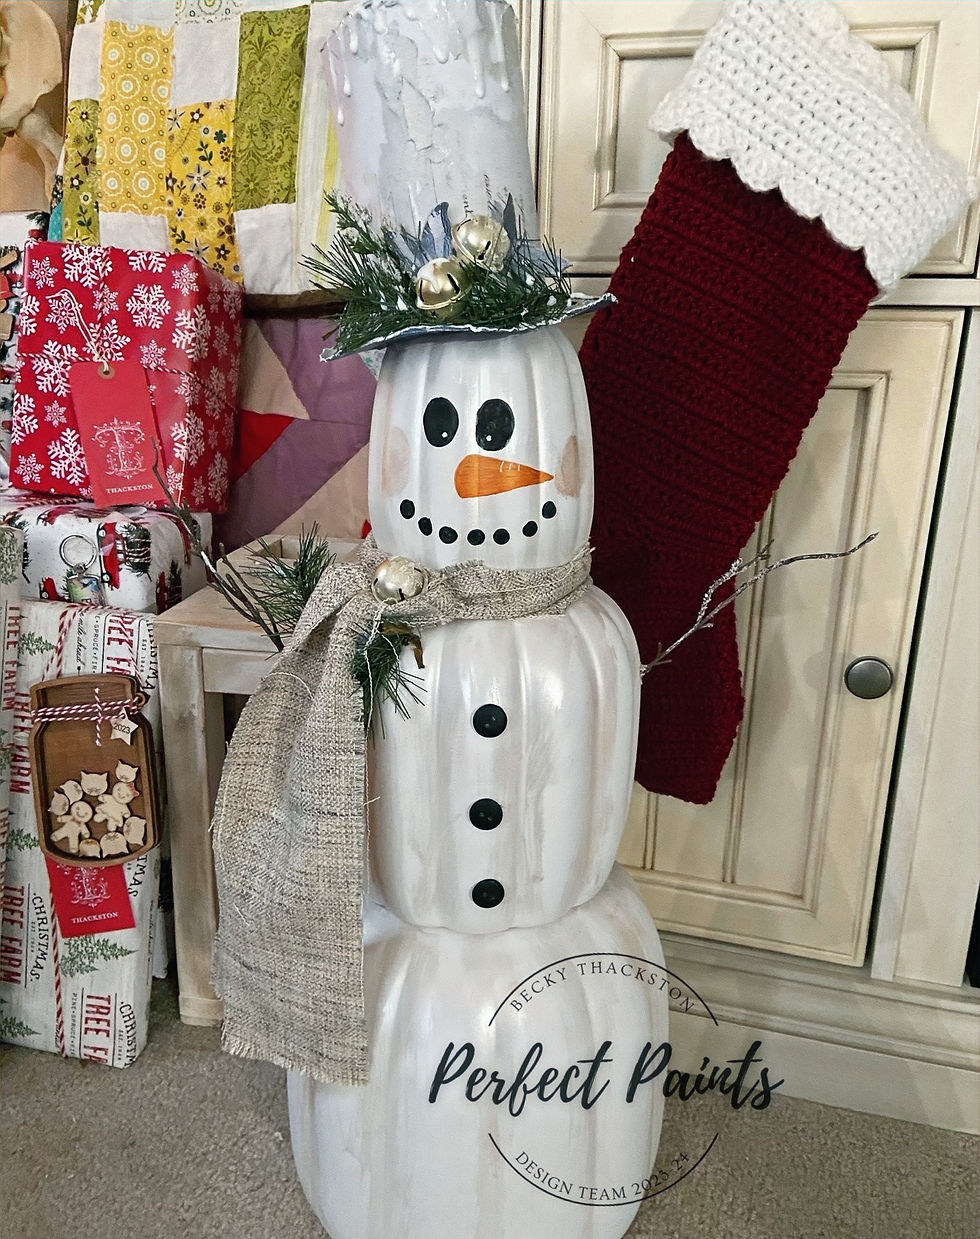
Perfect Paints meets Mr. Snowman!
- bthackston6
- Dec 18, 2023
- 3 min read
Hi all....it's Becky here with another project using Perfect Paints and those famous stacking pumpkins!
I wanted to share another way to take the stacking pumpkins and turn them into a fun holiday decoration. Meet Mr. Snowman - he can hang out all winter long.

Lets start off with what supplies you will need:
Stacking Pumpkins
White Spray Paint
Black Acrylic paint
Misc fabric scraps
Misc winter pick
Buttons
49 & Market Serenty Solids and Serenity Elements
49 & Market Tranquility Bravado paper
Puff paint and glitter
Perfect Paints Polishing Plaster Icicle
Perfect Paints Shimmering Acrylic Paints
To start off with I gave the pumpkins a good couple coats of white spray paint and let them sit overnight so they would be all ready to work on! Are you ready to give this one a try....following along and lets make a snowman!
Once the pumpkins had dried good....I took the Perfect Paints Shimmering Acrylic in Halo and brushed it all over the pumpkins. Mainly in the cracks as more of a highlight.

Now it is time to draw out the face. I just lighting sketched a face with a pencil and then went over that with black acrylic paint. It takes a few coats to get a good coverage. Then I used the Perfect Paints Shimmering Acrylic in Cajun Pumpkin for the nose. Isn't he cute!

Now to add the scarf! I was determined to use what materials I had at home so I found this scrap fabric and cut it at 4" wide. No need to glue it down.

Now for accessories! I decided to make his hat out of scrapbook paper so I grabbed some 49 & Market and went to town. For the base of the hat I used a cooking pot to sketch out my circle. Roughed up the edges with my scissors and then cut out the center hole so that it would fit over the stem of the pumpkin. For the tall portion of the hat I measured out 6" by 12" of paper, rolled it, and hot glued together. Then hot glue that to the base of the hat. I cut out a smaller circle and hot glued that to the top.
Grab some Perfect Paints Polishing Plaster in Icicle and start adding that randomly around the hat. I focused on the top so that I could get the 3D look of snow.
Add puff paint and glitter along the edges for added snow effects. I know...kinda looks like a hot mess right now but trust me!!!

I took a Christmas pick and tore it a part so that all the parts and pieces could be used for the hat and scarf.

Using different pieces of the greenery...layer some on the hat and some around the scarf. For the scarf I hot glued the greenery under the scarf and then glued the fabric over the top. Add some bells and a little more puff paint here and there. To finish off the hat, I added some butterflies from the 49 & Market Serenity Elements pack. Every snowman needs a butterfly :)

Using a stippling brush I added a hit of Perfect Paints Shimmering Acrylic paint in Ballet Slipper for the checks and then a few brushes along the pumpkins for just a hit of color.
The pick I had came with some sticks so PERFECT arms were created. I'm glad too because I was about to go stick hunting outside!
Hot glue the hat and you have now created a super cute snowman to last all winter long!


Comments